Sunday, January 20, 2013

Ice Dying- Snow days - the results

So, I have finished washing and drying my ice dyed, then snow dyed garments!


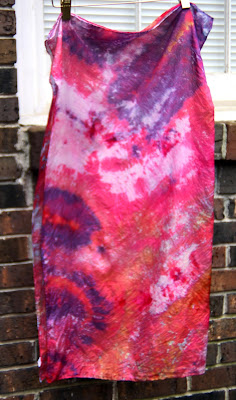
 First the snow and powdered dyed....


 Then it melted... yes there are some leaf bits and stray pine straw. It's snow in the south, we do not have blankets of the stuff to work with!


Tank top one, lots of turquoise! And, the yellow over dyed well.

Tank top 2- the red held it's own with the barrage of turquoise, navy and celadon.

Tank top 3- this one had the most of the green that went yellow, as well as some palomino gold, which interestingly did not turn green.

LESSONS LEARNED-

I wash a load right after these and they seems to have turned a bit blue. So it is either that my HE washer  did not drain all of the water thus depositing, or I remember that I did not re-mix the soda ash mix, which is in it's third use, so it is possible that the chemical reaction was not as strong and more dye released than expected.
~ So, mix the soda ash well
~ Perhaps only use it two times, or replenish
~ Only wash darks after a dye load
~ Try those "color catchers" from Shout


Let me know what you think!

Saturday, January 19, 2013

Ice Dying - take three - snow dying

It is a rare thing to see snow in Alabama. I took advantage of this rare occurrence to work on my ice dying project. Since ice dying originated with snow dying and my second experiment left a bit too much white on the garments, I decided to redye with the left over snow.  Leftover snow is even rare-er! But at least in the Deep South, snow one day, warm temps the next!

I can see a distinct advantage to using snow, or shaved ice. ( I realized that I could use shaved ice in the summer, or anytime without snow, to replicate this process, if I like it better than it ice cubes from the fridge.) You have precision in the placement of the dyes. As well as, you can get a more even distribution of the dye once the snow melts. OK, this last statement was an assumption, we will see one the garments come out of the dye bath. The garments were mostly green from the first time with a few bits of other colors.

I also had another realization, that I think was proved in second dye process, where the color was most intense, which means where it had the most powdered dye, dyed to the color base, not necessarily to the actual dye color. For example, the greens had a base of yellow, so the center of the green went yellow and the edges were green. The navy went purple in the center and the edges were purple. This could be a reaction with my water, so dying with the snow will eliminate most of the reaction if it is my local water.

Here's my process pics-
I used celadon,  turquoise and navy. This is my color map.

process pic without the arrows and words.


Sunday, January 13, 2013

First Ice Dye- The results!

Below are the images from my first ice dye bath. I think they turned out well! The baby hat on the left is super cute and I love that the fiber reactive dyed chemically bond to the fiber instead of just tinting them like the acid dyed.

My next batch is in the ice bath now! I am going for a more sophisticated color palette in the next run. What I have learned from this batch is that the lime green turns to yellow either on silk or when it is beside the reds. I did not add any yellow to the scarves, but it sure looks like I did except on the edges of the yellow and white.

I also like the blossom look to the tee shirt.  was hoping for a bit more "atmospheric" look. In the second batch, I have tried to leave more space where there is just ice and no dye with the thought that the dye water might wick.


Saturday, January 12, 2013

icy dying- first dye

Today I am starting a new dying technique featured on Dharma Trading Company's website a couple of weeks ago. See the step by step here! I am working with a variety of items on this first dye- two silk scarves, a tee shirt from Anvil and some baby hats from Snowflakes.

I am following Dharma's ice dying instructions to a tee, so I'm not going to re-invent the wheel for instructions. However, I will add some images of my process. The actual dying process take 24 hours. I have included a "map" to what items I have where in my container and what colors I put where. I will be interested to see what the colors look like and how they mix. By creating a map I can be a bit analytic in a process, though there are no guarantees of the outcome. This items went directly from the washer to the soda ash to the ice. I have other items that were washed, but not dyed. We will see if there is a difference!

Outcomes posted tomorrow!!!

Tight shot of the dye on the ice cubes.


The over all image of the ice with dyes on the garments.

A "map" of the colors used and the garments they are on.  I might have used more colors than listed, but this is a pretty good idea.